Chronographs are the timers seen on checkpoint, finish and multilap blocks. They keep time down to the millisecond.
Chronographs themselves can be placed without being part of a checkoint, finale or multilap block. They’ll continue working like a stopwatch even if they’re just decorational items.
Note: This guide makes use of Skyslide’s Blender Plugin, but the workflow applies to all modeling software.
¶ Setup
To begin making chronographs, you’ll first have to add the missing materials found on This page.
The chronograph works by assigning every digit its own material and uvmap.
¶ Creating Chronographs
You should start by placing the minutes, seconds and milliseconds first, then continue building the chrono-band around the timer.
- Make one face that is one unit tall or long if laid down and 0.6 units wide. This will be the face for one digit.
- Extrude the very right edge another 0.6 units. Now you’ll have two digits next to each other. Those being the 10’s and 1’s of minutes.
- Extrude the right edge 0.3 units. This face will be for the colon symbol.
- Extrude the right edge 0.6 units twice more for the 10’s and 1’s of seconds, followed by another 0.3 for a colon and three more 0.6 wide faces for the milliseconds.
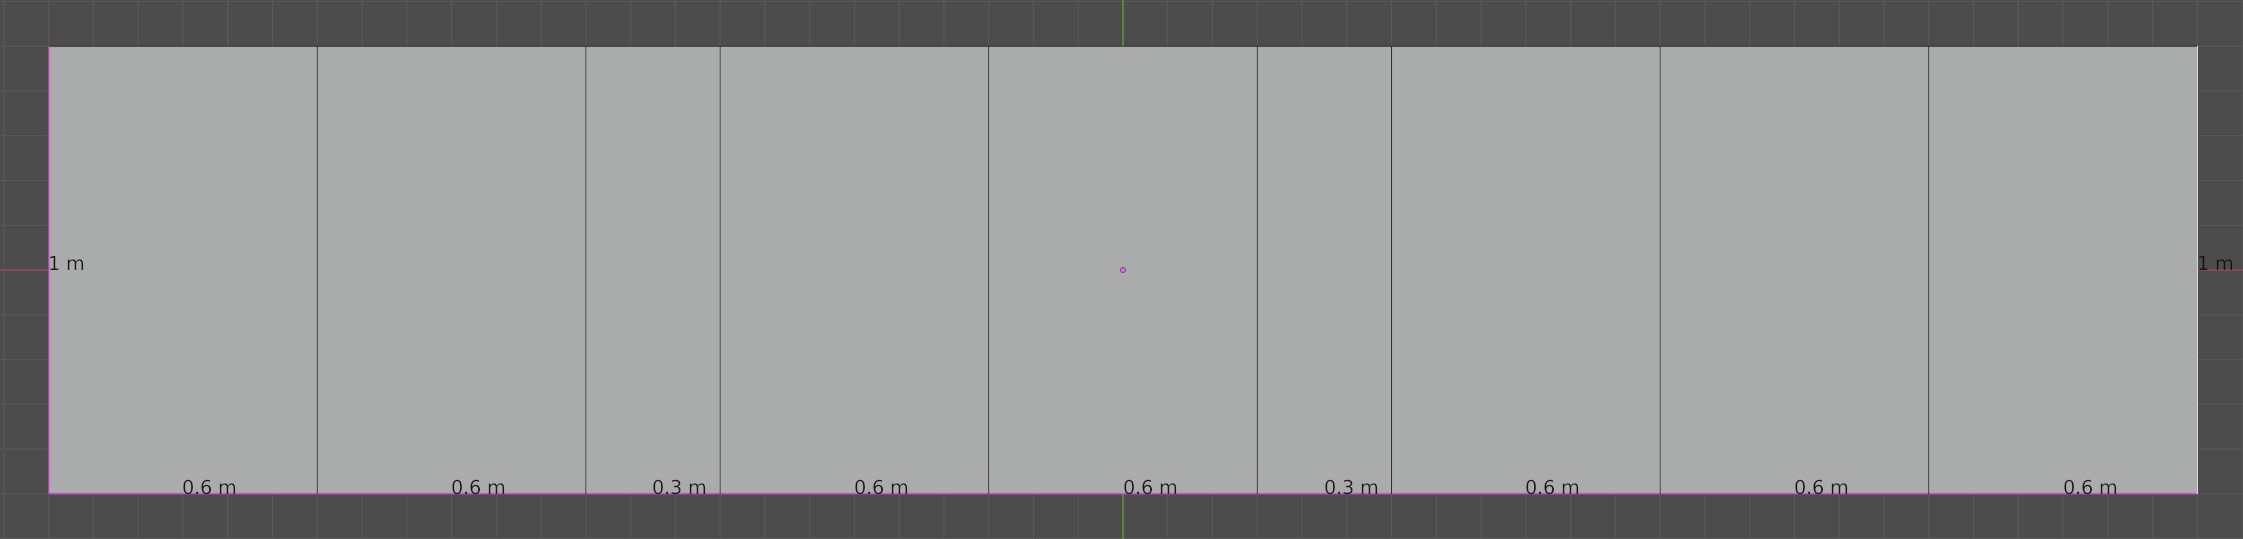
Note: You may change the size of the entire chronograph if you want. The sizes used here are just to get the aspect ratio correct.
¶ Assigning Materials
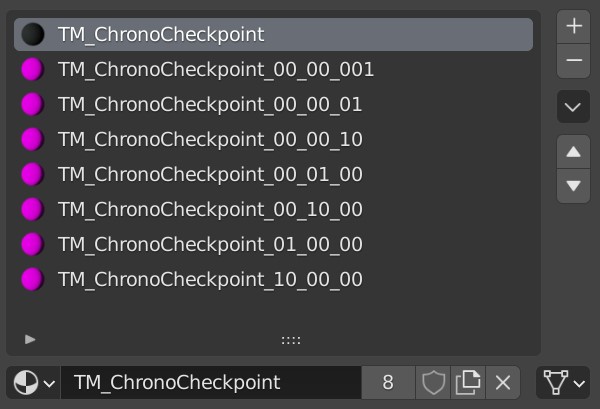
Using Skyslide’s plugin, add all the chrono textures.
Multilap uses: Chrono, Chrono_10_00_00, Chrono_01_00_00, ect.
Checkpoint use: ChronoCheckpoint, ChronoCheckpoint_10_00_00, ChronoCheckpoint_01_00_00, ect.
Finish uses: ChronoFinish, ChronoFinish_10_00_00, ChronoFinish_01_00_00,ect.
Each digit must be assigned to its respective material. 10_00_00 for the 10’s of minutes, 01_00_00 for the 1’s of minutes, ect.
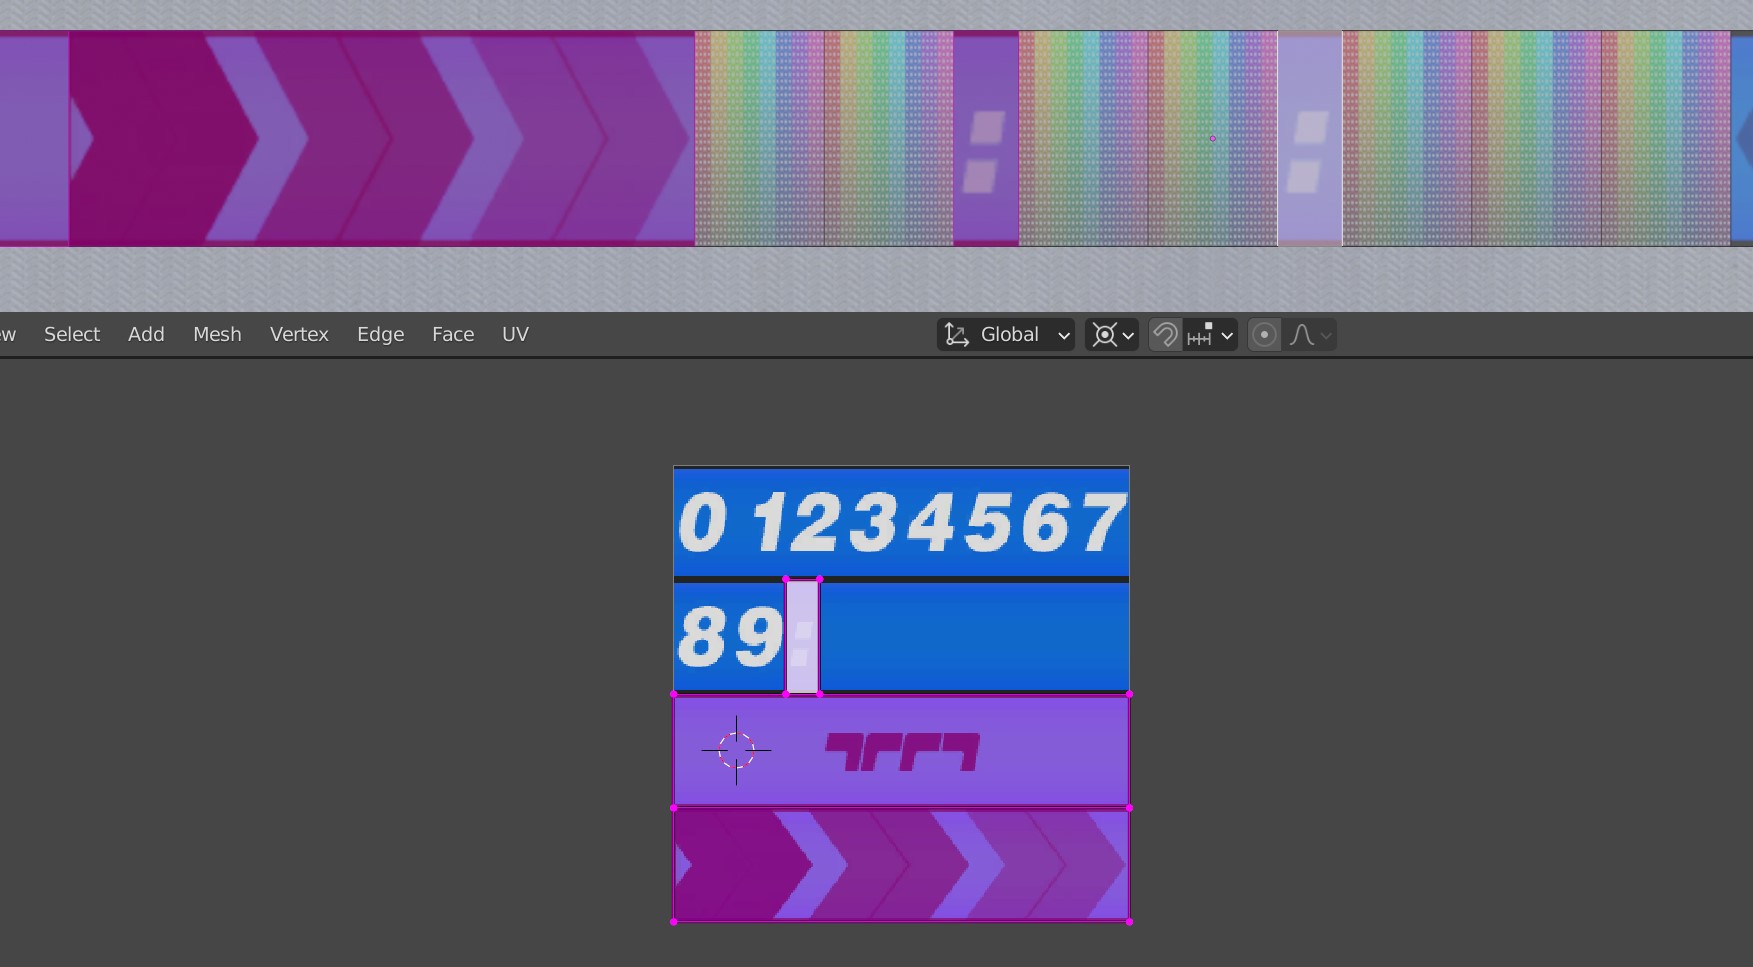
¶ UV Mapping
The uvmap of each digit has to spread the entire texture, with every corner of the face touching the corners of the image.
Toggle UV - Constrain to image bounds on to make this easier.
Make sure the uvmapping is not upside down or sideways
Now that the digits are Uv-mapped, you can UVmap the colons.
But first, you must import Chrono_I, ChronoCheckpoint_I or ChronoFinish_I which you have in C:\Users\USERNAME\Documents\Trackmania2020\Items\_BlenderAssets\Textures\Stadium after you clicked the Install Asset Library In Skyslide’s plugin at least once.
Alternatively, you can download all textures here
Swap the used texture on Chrono, ChronoCheckpoint or ChronoFinish to the imported texture.
Now you’ll be able to uvmap the Colons and surrounding parts of the chronographs.
Tip: The Trackmania logo and the arrows on the Checkpoint and Finish chrono textures fit perfectly on a 4x1 face.
To UVmap the colon easier, set the uvmap of the colon faces to the entire texture.
For Checkpoint and Finish:
- Scale the UV of the colon to the entire texture.
- Select the bottom vertices and move them .5 upwards.
- Select the top vertices and move them .25 downwards.
- Select the left vertices and move them .246 to the right
- Select the right vertices and move them .67979 to the left.
This maps the Uv perfectly to the pixels of only the colon. That way the black border on the top and bottom won’t be misaligned between the colons and digits. Plus, the overlaid “LCD” detail texture won’t spread or sqush on the colon.
For Multilap:
- Select the top vertices and move them .5 downwards.
- select the left vertices and move them .25 to the right.
- Select the right vertices and move them .625 to the left
¶ Material of Chronograph
Note that the material of the chronograph is set to NotCollidable in the material library.
That means if you want to embed the chronograph into the road you’ll need to either update the material property in blender to the material you want, or change the DSurfaceId in NadeoImporterMaterialLib.txt directly to always use your desired material.

¶ Export
Now the entire chronograph is done. You may decorate the rest of the block to your liking and export it.
Ingame you should place the block and wait ten minutes to make sure you really did assign the correct materials the correct way around.