Note: This guide makes use of Skyslide’s Blender Plugin, but the workflow applies to all modeling software.
¶ How waypoints work
Unlike other blocks and items, waypoints require up to two more pieces to make them work as intended.
Starts require a _socket_start
Checkpoints and Multilaps require a _socket_start and a _trigger_waypoint
Finishes require a _trigger_waypoint
_socket_start defines where the car will re-/spawn from.
_trigger_waypoint defines where on the block the vehicle must pass in order to actually trigger the waypoint.
As of now, there is no known way to make a checkpoint from which you can not respawn.
¶ Waypoint model itself
To begin, you’ll need to create your Start, Multilap, Checkpoint or Finish model.
Checkpoints, Multilaps and Finishes usually contain a chronograph (Stopwatch) as well, the creation of these is described here.
For this guide we will simply take a piece of road on which a chronograph has been added, which we’ll turn into a checkpoint.
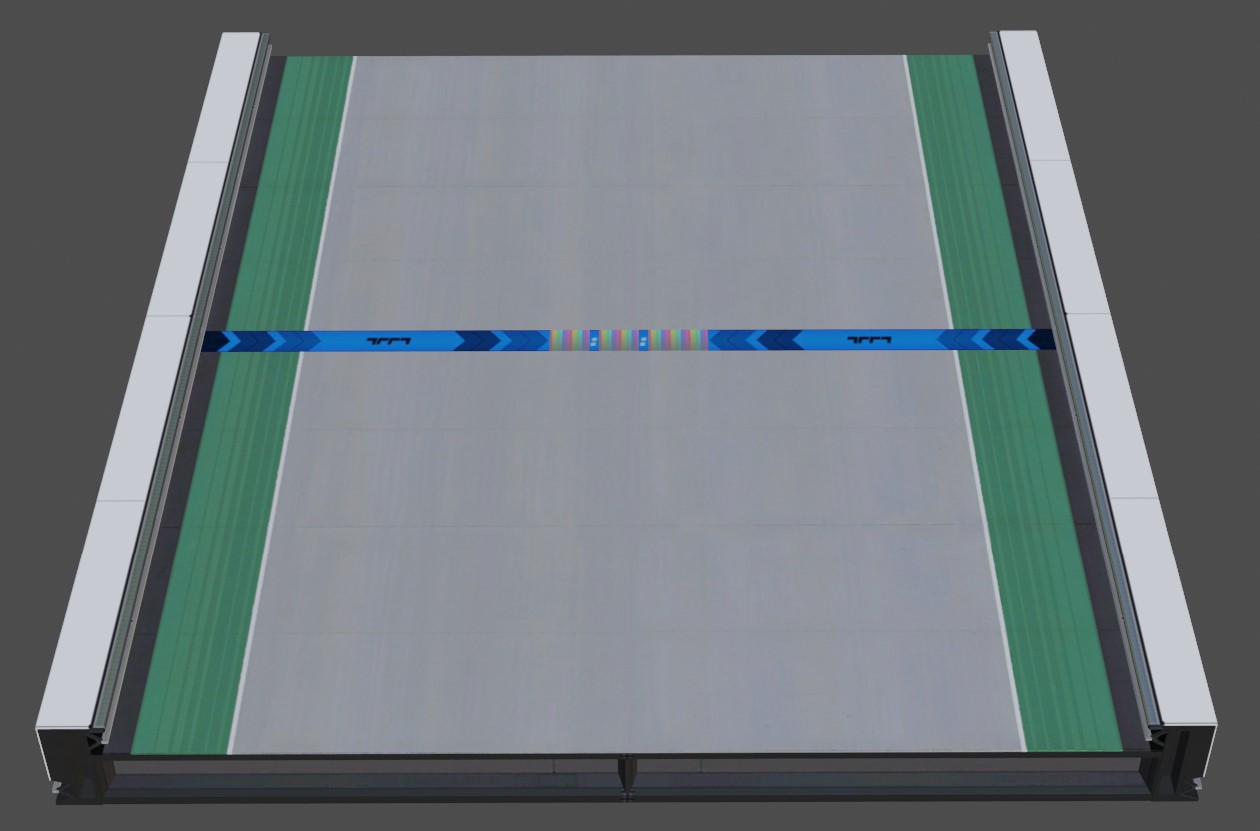
The road block has been loaded in the ingame mesh modeler, ripped with Ninjaripper 1.7.1 and then imported into Blender. The entire UV needed to be flipped upside down.
Making the visual block is entirely up to you.
We assume you’ve finished the model and want to turn it into a functional waypoint now.
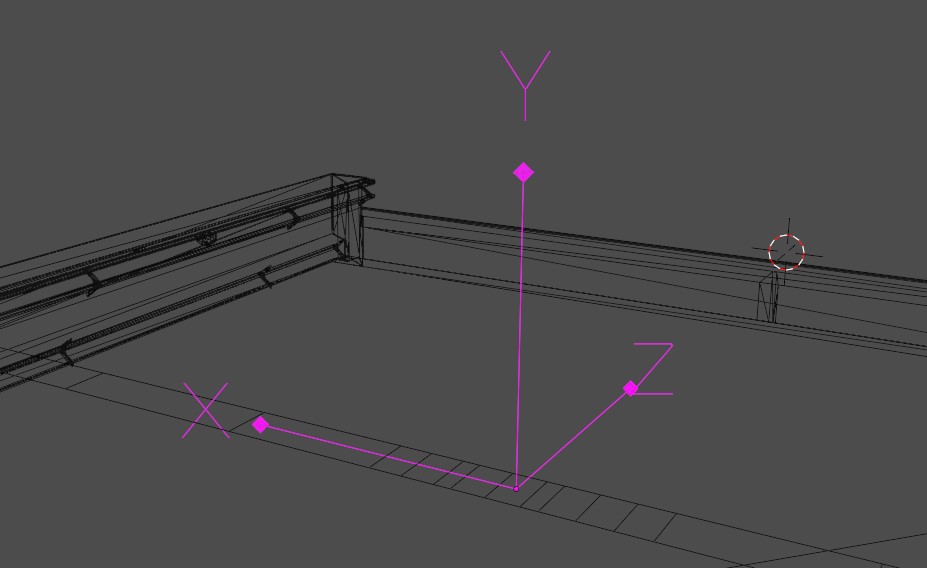
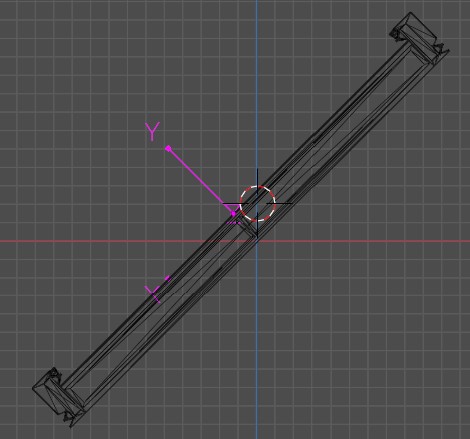
¶ _socket_start
As mentioned before, the _socket_start defines where the car will start from on a start block, or restart from a checkpoint when the “respawn” button has been pressed twice.
For checkpoints it would be a good idea for the socket and trigger be in the same position. Else you may respawn in front of, or after the trigger, which would be inaccurate.
To add the socket, add an empty using the arrows style, it should be 0.01 units above the road surface, else the car might spawn clipping into the road and either fall through the road, or jump upwards.
In object mode, click on Add > Empty > Arrows.
Z must point in the direction the car will be facing when spawned.
Y decides where the top of that car would be.
Y must be perpendicular to the road surface.
Make sure its name is exactly _socket_start
Note: You can not pitch or roll the socket past 90°, because that is the maximum rotation you’ll get.
The trigger will work on roads that are upside down, but the respawn socket will not respawn you upside down.
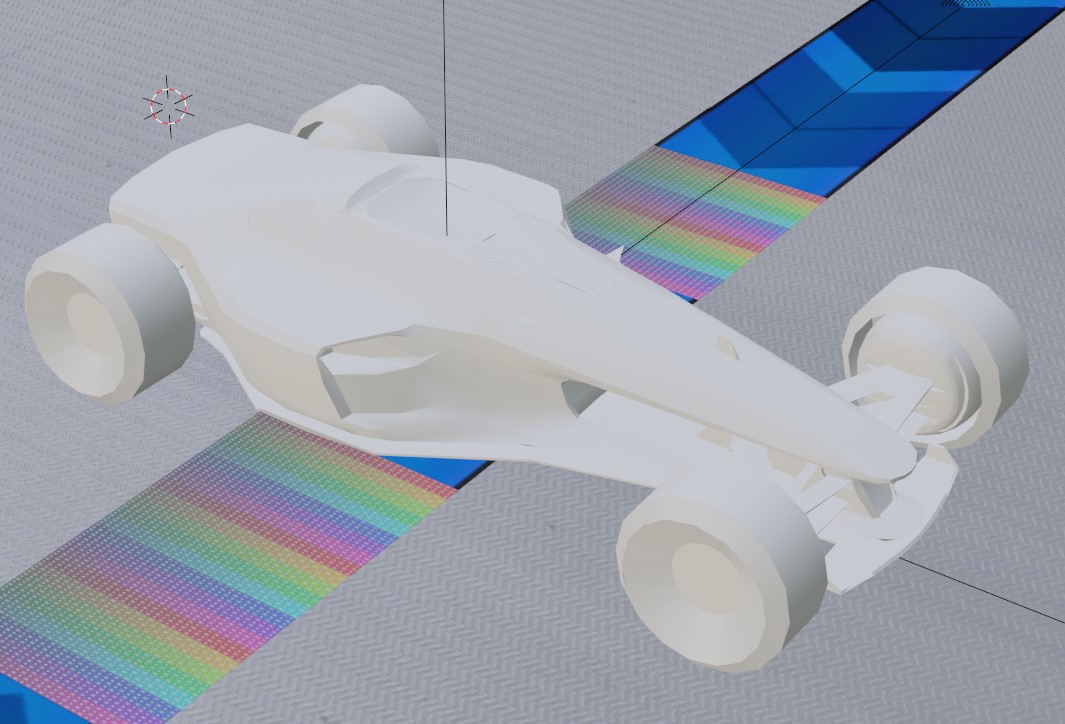
You can also add a lowpoly version of the vehicle for reference, by entering Object Mode and pressing Add > Car Spawns > Car Stadium
The lowpoly car should not be contained in the block’s collection in blender. You don’t want to export it.
Once the socket has been placed, that’s it. Nothing else is required for it to work.
¶ _trigger_waypoint
All you need for the trigger is a two-dimensional mesh of whatever height, width or shape you want. Passing through it from any direction will work.

Just make sure the trigger faces won’t be wider than the actual road, or whatever representative mesh you have.
As an example; Nadeo made the trigger of the finish blocks in Trackmania Nations incorrectly, allowing you to hit the trigger from underneath the road surface or the side of the arch.
Furthermore: any face of the trigger is capable of accepting the waypoint as passed.
If you make your trigger one giant box that covers the entire block, you will be able to trigger the waypoint from either end of the block. So make sure you only have a trigger face where you intend the trigger to be passable.
Once the _trigger_Waypoint has been created, make sure its origin in blender is the same as the piece of road.
Note: Only the _trigger_ part of the name is required. You can call it anything you want. _socket_start is the only piece that needs this specific name.
¶ Deciding Waypoint Type
So far you made a block that has a socket and a trigger, but you have not yet decided what waypoint it will be.
¶ Via Skyslide’s plugin
Use the “Object manipulation” section of the plugin to pick the Waypoint type.
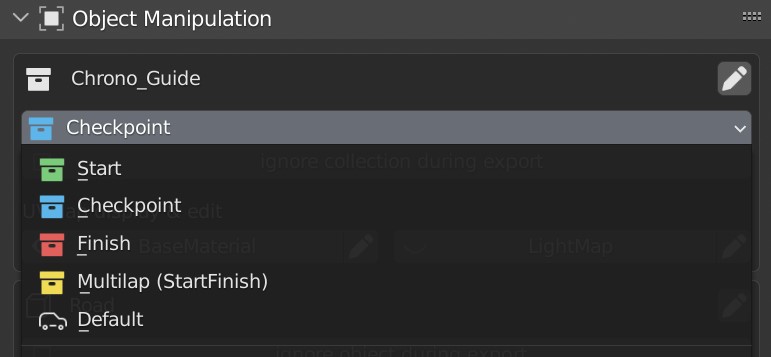
You can also just right click the collection in the outliner and pick the collection color.
Checkpoints are blue, Starts are green, Multilaps are yellow and Finishes are red.
¶ Via .item.xml
Waypoint type is handled by a single line:
<Waypoint Type="Checkpoint"/>
<Waypoint Type="Start"/>
<Waypoint Type="Finish"/>
<Waypoint Type="StartFinish"/> (Multilap)
Placed between your “Item” and “Phy” section of the item.xml.
<Item AuthorName="AUTHOR_NAME_HERE" Collection="Stadium" Type="StaticObject">
<Waypoint Type="Checkpoint"/>
<Phy>
</Phy>
<Vis>
</Vis>
<MeshParamsLink File="Chrono_Guide.MeshParams.xml"/>
<GridSnap   HOffset="0.0" HStep="16.0" VOffset="0.0" VStep="8.0"/>
<Levitation HOffset="0.0" HStep="8.0" VOffset="0.0" VStep="8.0" GhostMode="False"/>
<Options    AutoRotation="False" ManualPivotSwitch="False" NotOnItem="True" OneAxisRotation="False"/>
<PivotSnap  Distance="0.0"/>
</Item>
¶ End result
By now your blender collection should look something like this:
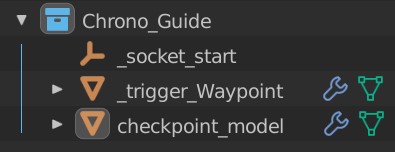
Make sure every piece is not hidden, because hidden objects won’t get exported.
Now you are done and you can export your waypoint.